

“Containers” by means of Jim Bahn is authorized underneath CC BY 2.0
Having a lab the place you’ll take a look at your utility or configuration earlier than sending it to a manufacturing setting is a useful useful resource to make sure deployments are easy and manufacturing is strong.
It’s no other with regards to container orchestration. Whether your manufacturing setting is a small cluster, a big on-premises setting, or perhaps a Red Hat OpenShift Service on AWS (ROSA) cluster at the cloud, making sure your configuration is sound by means of correctly checking out it in an area lab setting brings the similar advantages.
OpenShift Local permits builders to deploy a small, single-node OpenShift cluster on their very own machines in order that they are able to take a look at their utility in the neighborhood. They too can see how it could behave when working in a container orchestrator.
In this text I’ll display you methods to set up OpenShift Local for your native Linux system. You too can set up OpenShift Local with different running programs. For additional info seek the advice of the legit documentation.
[ Cloud services for cloud-native development ]
Get began with OpenShift Local
For Linux, OpenShift Local deployments are supported within the 2 newest releases of Fedora and Red Hat Enterprise Linux. You too can set up it on different Linux distributions when you have the next necessities:
- Network supervisor
- Libvirt
- Qemu (
qemu-kvm)
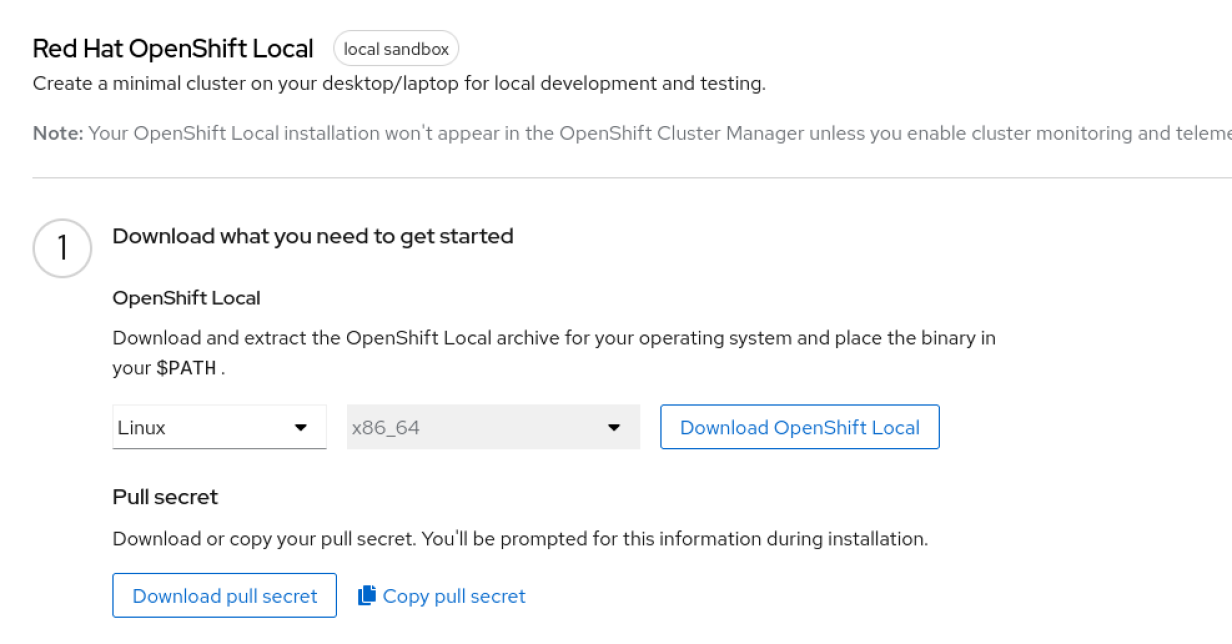
To get began with OpenShift Local, obtain the crc software from the Red Hat Console. If you would not have a Red Hat account, you’ll create one totally free with the Red Hat Developer program.
After you log in, obtain each the set up package deal and the pull secret from the Red Hat OpenShift Local display screen:
When the obtain finishes, decompress the crc software and transfer it to a location inside your PATH. If you would like stay the whole lot native for your person account, then create a listing and upload it for your PATH like this:
$ cd ~/Downloads/

$ tar xvf crc-linux-amd64.tar.xz
crc-linux-2.16.0-amd64/
crc-linux-2.16.0-amd64/LICENSE
crc-linux-2.16.0-amd64/crc

$ mkdir -p ~/native/bin

$ mv crc-linux-*-amd64/crc ~/native/bin/

$ export PATH=$HOME/native/bin:$PATH

$ crc model
CRC model: 2.16.0+05b62a75
OpenShift model: 4.12.9
Podman model: 4.4.1

$ echo 'export PATH=$HOME/native/bin:$PATH' >> ~/.bashrc
OpenShift Local runs as a unmarried node cluster in a digital system (VM) for your device. Because of this, it has some boundaries in comparison to an actual manufacturing setting:
- Control aircraft and employee node run at the similar system
- The cluster is ephemeral
- The cluster does no longer toughen computerized updates
For different variations, seek the advice of the documentation.
Set up your system
Before working your native OpenShift cluster, you wish to have to arrange your system by means of the usage of the crc setup.
The crc setup makes use of the listing $HOME/.crc to cache the digital system photographs required by means of the set up. Ensure you will have a minimum of 35GB of loose area in your house listing. If you employ LVM, you’ll create a logical quantity for it and mount .crc earlier than working the command.
When you run the setup for the primary time, crc asks whether or not you wish to have to supply nameless information to assist give a boost to the product. To save you this query from appearing, you’ll configure your choice in advance the usage of crc config:
$ crc config set consent-telemetry <sure/no>

$ crc config view
- consent-telemetry                     : sure
Now you’ll run the setup to configure your system:
$ crc setup
You wish to supply your sudo password permitting crc so as to add some community configuration to the NetworkSupervisor with the intention to attach for your cluster when it is working.
At this level, crc downloads and decompresses the digital system symbol in your native cluster. This might take a very long time relying for your community and disk pace.
[ Explore the versatility of virtual machines with the Everyday virtualization on Linux guide. ]
Start OpenShift Local
The crc setup command configures your device to run OpenShift and caches the VM symbol in $HOME/.crc. However, it does no longer get started the cluster routinely. At this level you’ll want to get started the cluster with the default configuration. If your system has extra sources and you wish to have to extend the sources to be had in your OpenShift cluster, you’ll regulate the VM configuration—just like the choice of CPUs or RAM—the usage of crc config.
The default configuration creates a VM with 4 digital CPUs and 9GB of RAM. This is sufficient for plenty of instances however it’s possible you’ll require extra sources relying for your utility necessities. For instance, to extend the choice of digital CPUs to eight and the reminiscence to 16GB, run crc config like this:
$ crc config set cpus 8

$ crc config set reminiscence 16384

$ crc config view
- consent-telemetry                     : sure
- cpus                                  : 8
- reminiscence                                : 16384
Now, get started your cluster with the command crc get started. You too can go the total trail to the pull-secret report you downloaded earlier than within the command line to steer clear of having to stick it right through the set up:
$ crc get started -p ~/Downloads/pull-secret
The crc get started command creates the VM and begins the cluster. You can see the VM sources by means of the usage of virsh:
$ virsh -c qemu:///device dumpxml crc | grep -e vcpu -e "memory unit"
  <reminiscence unit="KiB">16777216</reminiscence>
  <vcpu placement="static">8</vcpu>
After a couple of mins, the cluster is up and working and crc prints the relationship data:
Started the OpenShift cluster.

The server is out there by the use of internet console at:


Log in as administrator:
  Username: kubeadmin
  Password: ahYhw-xJNMn-NyxMT-47t22

Log in as person:
  Username: developer
  Password: developer

Use the 'oc' command line interface:
  $ eval $(crc oc-env)
  $ oc login -u developer
Access your new cluster
With your OpenShift Local cluster up and working, you’ll get right of entry to it to deploy programs. When you ran crc setup, it additionally downloaded further command-line equipment like oc with the intention to attach for your cluster from the command line. To use those equipment, you wish to have to arrange your setting to verify they are able to in finding your cluster:
$ eval $(crc oc-env)
Then, attach for your cluster as administrator the usage of kubeadmin with the password generated by means of the crc setup command:
$ oc login -u kubeadmin
You can now get right of entry to cluster data. For instance, ascertain that you are working a unmarried node that works each as management aircraft and employee node the usage of the command oc get nodes:
$ oc get nodes
NAME                STATUS  ROLES                        AGE  VERSION
crc-8tnb7-master-0  Ready   control-plane,grasp,employee  20d  v1.25.7+eab9cc9
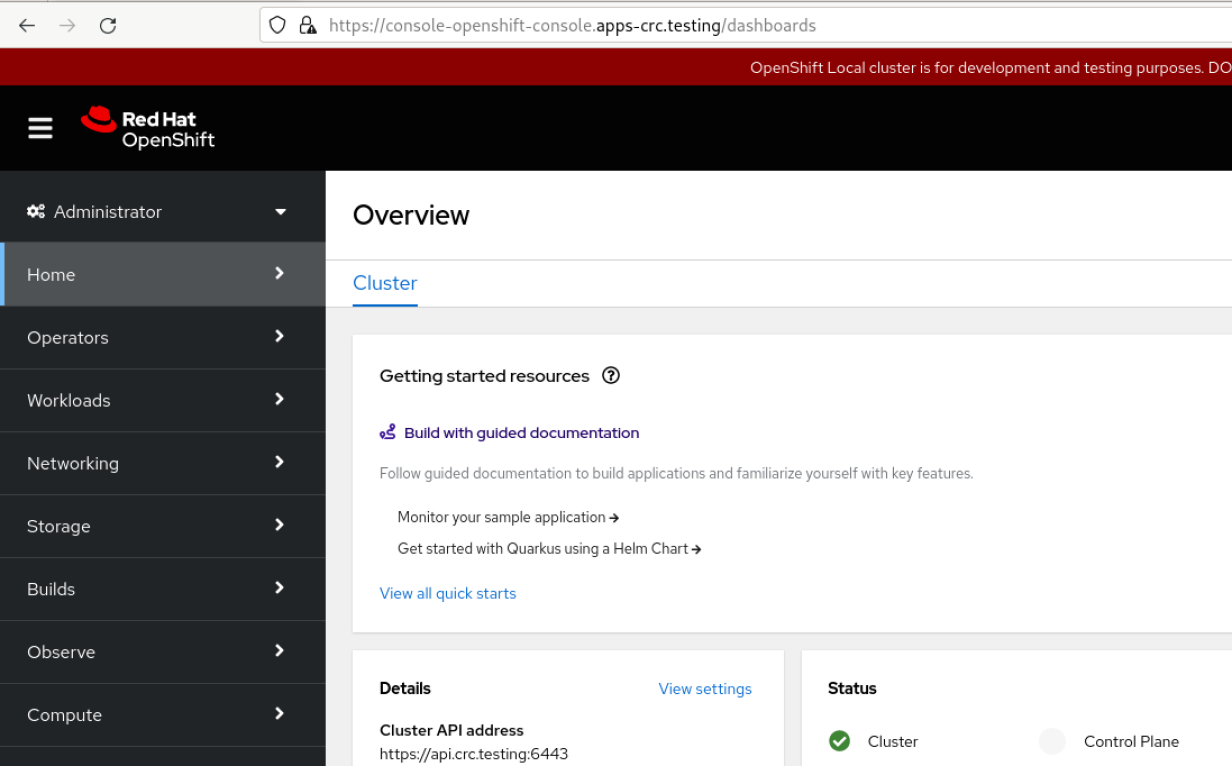
If you would like use the graphical console, you’ll get right of entry to it by means of pointing your browser to :
[ Learning path: Getting started with Red Hat OpenShift Service on AWS (ROSA) ]
What’s subsequent
OpenShift Local supplies a handy guide a rough and simple option to arrange an area OpenShift cluster for your desktop or computer. This permits you to take a look at your programs and configuration parameters earlier than sending them to manufacturing. It’s additionally a super choice to be informed or follow OpenShift talents that will likely be helpful in actual manufacturing environments.
Now that your cluster is working, I’ll display you in my subsequent article methods to deploy a pattern utility on it.
No Comment! Be the first one.