Amazon Web Services is a great platform not only for AWS Free Tier, but also for businesses of all sizes. It offers a wide range of services, from data storage to networking. And it’s perfect for small businesses that want to get the most out of their resources. If you’re looking to free up some space on your servers, or if you’re looking to take advantage of Amazon’s cloud-based infrastructure, then you need to check out Amazon Web Services!
To get AWS Free Tier you have to sign up for it, follow these steps to sign up AWS Free Tier:
Create a Free Account on AWS
Visit AWS Website
Go to the AWS website (https://aws.amazon.com/) and click the “Create a Free Account” button.
Verify your Email Address for AWS Free Tier
In this step, you will be asked to verify your Email Address for the root user and give an Account Name. Lastly, Press Verify email address button.
In my case, I’ve provided my email address [email protected] created for the sole purpose of using AWS Free Tier and used my name as the account name, i.e. roosho
Verification will be sent to your email. Put that code into the following step and Press Verify Button as marked in the following image.
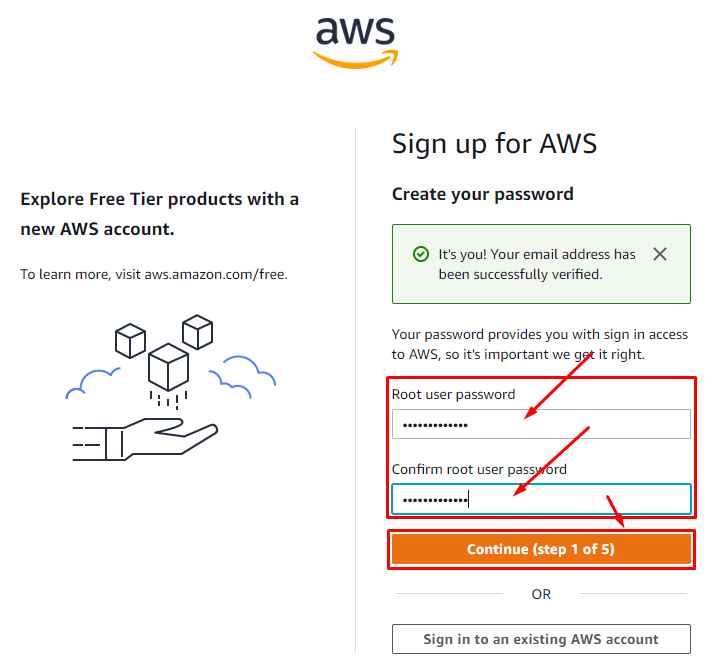
Set Password for root User
In this step, set a comparatively complex password you can remember following the ASW Password Guideline. Alternatively, you might generate a password from some SaaS Password Generator like site24x7 and note it down.
Fill up your Information
I’d recommend selecting the Personal Plan here in this step. You will need to provide your account’s full name (i.e., your full name), phone number, and postal address. Agree with the AWS ToC by checking the check box and clicking Continue.
Provide your Credit Card Details
Provide your credit card details here. Remember, a credit card means a transactional card, which could be VISA, MasterCard, American Express, or Discover, that contains a balance in any internationally convertible currency such as US Dollar, Pound sterling, Euro, etc. No matter whether that card is a Credit Card, Debit Card, or a Prepaid Card. For Bangladeshis, you must have a Dual Currency card endorsed with your Passport and keep a minimum balance of $1.15. Press Verify and Continue button.
Confirm your Identity
Confirm your identity by providing a valid Mobile Phone Number, filling up the Captcha, and pressing Send SMS button.
You will get an SMS containing the verification code. Put that into the Verify Code Text Box and Press Continue.
Select your Plan for AWS Free Tier
Select Basic support – Free as your AWS Plan and Press Complete Sign Up button to complete.
Access AWS Management Console of your AWS Free Tier
You have already completed signing up for the AWS Free Tier for 12 Months.
Access Management Console
Now it’s time to access the AWS Management Console. Click Go to the AWS Management Console.
Log in to AWS Management Console
Select Root user and provide the Root user email address and press Next button.
Provide your root user password and click Sign in to access the Management Console
AWS Free Tier Management Console Dashboard
Voilà!! You are now at the AWS Management Console. To use a service covered by the Free Tier, simply click on the service in the AWS Management Console and follow the prompts to create an instance or use the service.
If you exceed the limits of the AWS Free Tier, you will be charged for the additional usage. To avoid unexpected charges, it’s a good idea to regularly check your use of the AWS services and ensure you stay within the Free Tier’s limits.
I hope this helps! Let me know if you have any other questions.


One Comment
[…] An AWS account (Learn How to get AWS Free Tier for One Whole Year) […]